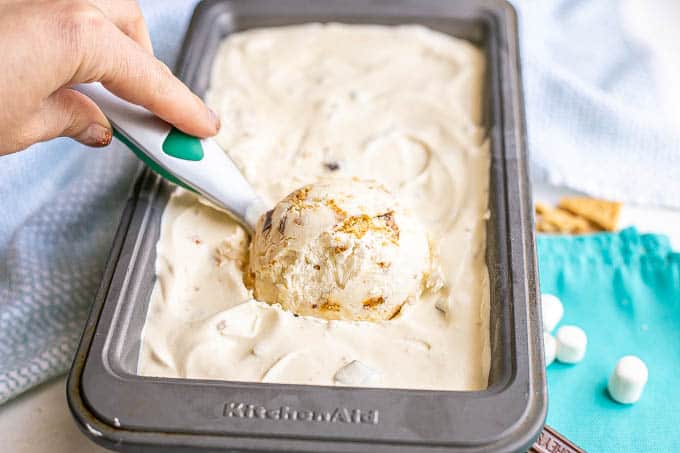
S'mores Ice Cream
Homemade no-churn s’mores ice cream with toasted marshmallows, graham crackers and chocolate pieces is just 15 minutes to prep and so incredibly flavorful and delicious!
Yield: 8 servings
Ingredients
- 1 pint (2 cups) heavy whipping cream, cold
- 1 (14. oz) can sweetened condensed milk (fat-free is fine to use)
- 1 tablespoon pure vanilla extract
- 1 cup mini marshmallows
- 1 cup graham cracker crumbs (from about 4 sheets)
- 1 Hershey’s chocolate bar, chopped
Instructions
- Place a large mixing bowl in the freezer to get cold for 5-10 minutes while you prep the marshmallows and gather the other ingredients.
- To toast the marshmallows: Line a baking sheet with parchment paper AND spray with cooking spray. Spread the mini marshmallows in an even layer. Place the baking sheet in the oven or toaster oven in the middle rack - not the top rack. Broil on high using that middle rack for 2-3 minutes. Watch closely and remove when they are golden brown and toasted. Let cool for a few minutes before folding into the ice cream. They will deflate, and that's fine. Just break them up a bit as you add them to keep it from being one big mass of marshmallows.
- Pour the cold heavy whipping cream into the cold mixing bowl. Beat with a hand mixer or stand mixer until stiff peaks form, about 5-6 minutes. (You can start on low speed to avoid splatters and work up to medium speed.) Additional details are below in the notes section if needed.
- In a small bowl, combine the sweetened condensed milk and vanilla and stir until well combined.
- Add the sweetened condensed milk mixture to the bowl with the whipped cream and gently fold in until well combined.
- Add the toasted marshmallows (pull them apart and break up with the spoon as you go if they are all stuck together), graham cracker crumbs and chopped chocolate to the ice cream and fold until just combined.
- Pour the soft ice cream mixture into a freezer-safe container, such as a 9x5 loaf pan or shallow bowl or plastic container. Cover tightly with plastic wrap.
- Place in freezer for at least 3-4 hours to allow it to set up. (It will be completely set by 6 hours but is usually ready to enjoy after 3-4 hours.)
- Store in the freezer, covered, for up to 10 days.
Save This Recipe
Notes
Heavy cream: You’ll need 1 pint — or 2 cups — of heavy whipping cream. Details below on how to do the whipping part. I have not tried this with other substitutes.
Sweetened condensed milk: You can use a can of regular or fat-free sweetened condensed milk. I’ve tried it with both before. Just be sure you are not using evaporated milk. Not the same.
Marshmallows: Toasting the marshmallows is super simple in an oven or toaster oven and really makes all the difference here to give it that authentic s'mores flavor. If you only have regular size marshmallows, you’ll need about 6. Try to cut them up or pull them apart into smaller pieces so they get incorporated more evenly throughout the ice cream. (Admittedly, this isn’t easy to do which is why I prefer the mini marshmallows.)
Chocolate: I’ve always made this with a bar of Hershey’s chocolate that I chop up. You could also try it with some mini or regular chocolate chips if you’d like. Or you could use a dark chocolate bar if you prefer.
Freezing: For freezing, you’ll want to put the ice cream in a freezer-safe container. I use a 9x5 bread pan and it works perfectly. (If you only have an 8x4, that will do, but it’ll be VERY full.) A pie pan or shallow freezer-safe bowl would work too. A large freezer-safe plastic container is good too.
Set up time: Freeze time will vary, but it’s usually ready to eat in 3-4 hours, but might still be a little bit soft. After 6 hours, it should be completely set up.
How to make whipped cream:
- You’ll need a hand mixer or stand mixer.
- You put your cold heavy whipping cream in a large bowl (which you can chill for a few minutes) then you turn your mixer on low.
- Start with low for a minute or two to get it going so your whipping cream doesn’t splatter all over your kitchen. You can gradually increase the speed up to medium, as long as the splatters aren’t too out of hand.
- You’ll need to beat it for about 4-6 minutes, until stiff peaks form. Stiff peaks means that when you hold up the mixer, the whipped cream stands up. It’s not so liquid or loose that it falls right off back into the bowl.
- Chocolate sauce or caramel sauce
- Extra crushed graham crackers
- Crushed cookie pieces
- Mini or regular chocolate chips or more chopped Hershey’s pieces
- Sprinkles
Nutrition
Serving: 1serving | Calories: 227kcal
Tried this recipe?Leave a comment below or follow me on Instagram @familyfoodonthetable and tag me in your photo!
